JavaScript Tutorial: Smarter Scripts with Operators

In the previous lesson you already employed an assignment operator ( = ) and an arithmetic operator, specifically the  multiplication operator ( * ), to write a basic JavaScript shopping cart script.We can easily see that to do something useful with JavaScript, we need a way to manipulate data and variables. We do this with operators.
JavaScript Tutorial: Smarter Scripts with Operators
In this lesson you are going to learn how to use:
  • arithmetic operators;
  • the + sign to concatenate text (concatenation operator);
  • comparison operators;
  • logical operators.
Also, you’ll get plenty of opportunities to practice coding with variables. Let’s get started!

Arithmetic operators

As you might have guessed, arithmetic operators are used to perform arithmetic operations between values or variables. Here’s a table for your reference.
If x = 20, y = 5, and z = result, we have:
OPERATORJAVA SCRIPT EXAMPLERESULT
Addition: +z = x + yz = 25
Subtraction: –z = x – yz = 15
Multiplication: *z = x * yz = 100
Division: /z = x / yz = 4
Modulus: %z = x / yz = 0
Increment: ++z = ++xz = 21
Decrement —z = –xz = 19
I guess you’re quite familiar with most arithmetical operators. The odd ones might be the ( % ) modulus, the ( ++ ) increment, and the ( — ) decrement operators.
Modulus: the remainder left over after division.
Increment: take a number and add 1 to it.
Decrement: take a number and subtract 1 from it.
Time to get coding! Get your hands on the text editor and prepare a new HTML document like the one below:

Try out: add 2 values and print the result

   
   <!DOCTYPE html>
   <html>
   <head>
   <title>Lesson 5: Operators and Comparisons</title>
   </head>
   <body>
   <h1>Lesson 5: Operators and Comparisons</h1>
   
   <script type="text/javascript">
   
   //Create and initialize your variables
   
   var result = 0;
   
   var firstNum = 20;
   
   var secondNum = 5;
   
   //Addition: result = 25
   
   result = firstNum + secondNum;
   
   //write result on the page
   
   document.write(result);
   
   </script>
  
   </body>
   </html>
   
Nothing new here except for the JavaScript command document.write(). This command is translated by the JavaScript interpreter as saying:
“Hey browser, get the value within brackets and print it on the HTML document!”
In our case the value is a variable, therefore no ( ‘ ‘ ) quotes are used to enclose it. If you want to print some text instead, the command must be:document.write(‘some text.’);. It’s all very similar to the alert() command you’ve been using so far.
Now experiment with the code sample above by trying out all the other arithmetic operators and printing the result on the page.

Concatenation operator

If you want to add pieces of text together to form one long line of text, use the + sign. In Geeky talk a piece of text is called string, and it appears enclosed either in (‘ ‘) quotes or (” “) double-quotes (remember the ‘Hello World’ text you used in the alert() command? That is an instance of string).

Try out: concatenate strings and print a message on the page

   
   <!DOCTYPE html>
   <html>
   <head>
   <title>Lesson 5: Operators and Comparisons</title>
   </head>
   <body>
   <h1>Lesson 5: Operators and Comparisons</h1>
   
   <script type="text/javascript">
   
   //Create and initialize your variables
   
   var firstText = "Hello";
   
   var secondText = "World!";
   
   //Resulting value of assignment is Hello World!
   
   var message = firstText + ' ' + secondText;
   
   //write result on the page
   
   document.write(message);
   
   </script>
  
   </body>
   </html>
   
If you typed your code correctly, you should see the famous Hello World! text smack on the web page.Notice: you separate Hello and World! by concatenating quotes (‘ ‘) in-between each piece of text or variable.
Now get some practice concatenating strings before moving on.

Comparison operators

Often you need to compare different values and make your JavaScript program take different directions accordingly.
For example, you’re coding a JavaScript script for a shopping cart application. At one point, your script will have a statement saying something along these lines: if the total amount to be paid is greater than or equal to $50 apply a 5% discount, if it’s less than or equal to $50 do not apply 5% discount. Don’t be impatient, you will learn how to code this kind of conditions in the next lesson.
It’s here that comparison operators, such as equal to, less than, etc. enter the scene. Here below are listed all comparison operators for your reference.
If x = 10 we have:
OPERATORWHAT IS IT?EXAMPLE
==equal tox == 5 is false
===exactly equal to value and typex === 10 is true
x === “10” is false
!=not equalx != 2 is true
>greater thanx > 20 is false
<less thanx < 20 is true
>=greater than or equal tox >= 20 is false
<=less than or equal tox <= 20 is true

Logical operators

You use logical operators when you need to determine the logic between certain values.
Going back to the shopping cart script example, you might want your script to apply a 5% discount if the following 2 conditions are both true: a given product costs more than $20 and is purchased before the 31st of December.
Here come logical operators to the rescue. Given that x = 10 and y = 5:
OPERATORWHAT IS IT?EXAMPLE
&&and(x < 20 && y > 1) is true
both conditions must be satisfied
||or(x == 5 || y == 5) is true
at least 1 condition must be satisfied
!not!(x == y) is true

Questions, questions, questions

The tables above are self-explanatory, except for the following 2 questions:
  1. When you talk about === , what do you mean by equality of value and type?
  2. What’s the difference between ( = )( == ), and ( === ) ?

Answer to question 1.

Values are the specific data, either directly in your JavaScript statements or contained in JavaScript variables. For example:
   
   var price = 5;
   
In the code snippet above, the variable price has value 5.
What’s the type?
The type, or more precisely the data type, is the way JavaScript classifies data. You’ve come across 2 data types, that is, number and string (text). A third data type is Boolean, that is, true and false statements.
Therefore, when you compare 2 values using ( === ), the 2 values are compared on the basis of both their value and their data type:
   
   var firstNum = 4;
   
   var secondNum = 4;
   
   //this is true: both values are 4
   
   //and both values are of type number
   
   firstNum === secondNum;
   
   //let's use a string data type. A string uses ' '.
   
   var stringNum = '4';
   
   //Now === is false: 4 and '4' are different types
   
   firstNum === stringNum;
   

Answer to question 2.

The ( = ) operator is used to assign or give a value to a variable. It is not a sign for equality.
The ( == ) and ( === ) operators instead, do stand for equality. They do not assign values to variables.( == ) compares only values, ( === ) compares both values and data type.

Summary

You’ve made it all the way through this lesson, congratulations! Now your scripts are not limited to just popping up messages. They start to be smart: they can make calculations, comparisons, and set truth conditions to evaluate their data.

Article Source:http://www.techstarcle.com

Read More...

JavaScript Tutorial: JavaScript Variables and Constants

Variables and constants are like containers where you store data and values for processing in JavaScript.
The difference between a variable and a constant is this: once you give a value to a constant the value is meant to be kept unchanged throughout the script. In all circumstances where you reasonably foresee that the original value is modified through the script, by all means use a variable as your storage room. In fact, you’re going to use variables most of the times.
JavaScript Tutorial: JavaScript Variables and Constants
In this lesson, you’re going to learn:
  • how to create variables and constants;
  • how to assign values to variables and constants;
  • how to use variables in your code;
  • how to name variables and constants correctly.

How to create variables and constants

You declare, that is, create variables and constants in a similar way.
Here’s how you declare a variable:
   
   /*To declare a variable you give it a name preceded
   
   by the JavaScript keyword var*/
   
   var amountDue;
   
In the sample code above you declare a variable named amountDue.
The variable declaration ends with a ( ; ) semicolon, which makes it a self-contained statement.
Also, because JavaScript is case sensitive, every time you refer to the amountDue variable, make sure you keep the letter case exactly the same as the original declaration (this particular notation is called camelCase because it looks like a camel’s hunch).
Here’s how you declare a constant:
   
   /*To declare a constant you give it a name preceded
   
   by the JavaScript keyword const
   
   Also take note: const is not supported by Internet Explorer
   
   use var instead: it's safer*/
   
   const taxRate;
   
In the sample code above, you declare a taxRate constant. As you can see, the declaration is very similar to the variable declaration, the only difference being the keyword used: var in the case of a variableand const in the case of a constant.

How to assign values to variables

After you create a variable, you must assign (give) a value to it (or said in Geeeky talk “initialize a variable”) . The ( = ) equal sign is called assignment operator: you assign the value of what is on the right side of the = sign to whatever is on the left side of the = sign. Notice: you cannot perform operations with empty variables.
Ready to fire off your text editor? Let’s get coding!
Prepare a basic HTML document with the JavaScript code illustrated below:
   
   <!DOCTYPE html>
   <html>
   <head>
   <title>Lesson 4: Variables and Constants</title>
   </head>
   <body>
   <h1>Lesson 4: Variables and Constants</h1>
   
   <script type="text/javascript">
   
   //Create a variable
   
   var amountDue;
   
   /* Assign a value to it:
   
   you do not know the value yet
   
   so for now it is 0 */
   
   amountDue = 0;
   
   /* Create 2 more vars and assign 
   
   a value to each at the same time */
   
   var productPrice = 5;
   
   var quantity = 2;
   
   /* Assign a value to amountDue by
   
   multiplying productPrice by quantity */
   
   amountDue = productPrice * quantity;
   
   /* Notice how the value of amountDue has
   
   changed from 0 to 10 -
   
   -Alert the result to check it is OK
   
   Notice: you do not use ' ' with var name in alert() */
   
   alert(amountDue);
   
   </script>
  
   </body>
   </html>
   
Did you see the good old alert box displaying the number 10 popping up? If you didn’t, make sure your code is typed exactly the same as in the snippet above (Notice: When tracing bugs (errors) in your JavaScript code, look out for brackets, semicolons ( ; ), quotes (‘ ‘), and letter casing).
That’s great! Try experimenting with the code above. For example, change the value of quantity and productPrice, or just come up with your own variables.

How to name variables (and constants)

Choose descriptive names for your variables (var amountDue; rather than var x;): this way your code will be more readable and understandable.
While this can be called good programming practice (but also common sense), there are also syntax rules (yes, just like any natural language) when it comes to naming variables, and they must be obeyed, at least if you want your JavaScript script to work.
Keep an eye on the following simple rules when you name variables:

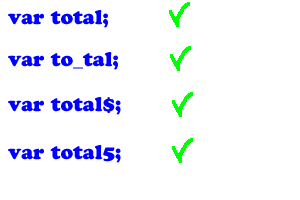
1) The first character must be a letter, an ( _ ) underscore, or a ( $ ) dollar sign:

JavaScript Tutorial: JavaScript Variables and Constants

2) Each character after the first character can be a letter, an ( _ ) underscore, a ( $ ) dollar sign, or a number:

JavaScript Tutorial: JavaScript Variables and Constants

3) Spaces and special characters other than ( _ ) and $ are not allowed anywhere:

JavaScript Tutorial: JavaScript Variables and Constants

Summary

Variables and constants are the building blocks of any programming language. In this lesson you learned the part they play in JavaScript, how you declare and assign values to them, how to name your variables correctly, and you also had a taste of using variables in JavaScript.

Article Source:http://www.techstarcle.com

Read More...

JavaScript Tutorial: JavaScript Events

The web is a dynamic environment where a lot of things happen. Most appropriately, they’re called events. Some of these events, like a user clicking a button or moving the mouse over a link, are of great interest to a JavaScript coder.
JavaScript Tutorial: JavaScript Events
By the end of this lesson you will know:
  • what events are;
  • what JavaScript can do with events and how.

What are events?

Events are occurrences taking place in the context of the interactions between web serverweb browser, and web user.
For instance, if you’re on a web page and click on a link, there are at least 3 important events being triggered:
  1. onClick event: triggered by you as you click the link;
  2. onUnload event: triggered by the web browser as it leaves the current web page;
  3. onLoad event: triggered by the browser as the new web page content is loaded.

Which events should I focus on from a JavaScript point of view?

It all depends on the JavaScript program you’re writing, that is, on the objectives you want to achieve with your script.
However, the most common events you’re likely to deal with in your JavaScript are:
  • onLoad/onUnload;
  • onClick;
  • onSubmit (triggered by the user submitting a form);
  • onFocus / onBlur (triggered by a user as, for example, she clicks in a textbox or clicks away from a textbox respectively);
  • onMouseOver / onMouseOut (triggered by the user moving the mouse over or away from an HTML element respectively).
There are other events that might eventually be of interest to you as you write sophisticated JavaScript scripts, such as scroll events (as users scroll up and down a web page), onTextChanged events (as users type in a textbox or textarea), even touch events, which are likely to gain interest in today’s mobile and tablet-invaded world.
However, for the purposes of this tutorial, you’re mostly going to come across the core events listed above.

What do I do with events from a JavaScript point of view?

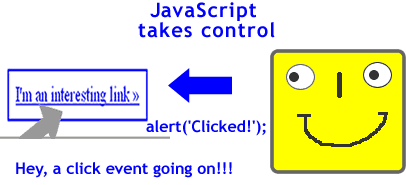
As you write a JavaScript program, events become interesting because they give your script a hook for gaining control on what happens in the web page.
Once your script gets hold of the hook provided by the event, your script is boss. The jargon for this is event-driven programming: an event happens and JavaScript handles it, for instance by displaying an alert box with a message for the user.
JavaScript Tutorial: JavaScript Events
Conclusion: events bend to JavaScript commands by means of event handlers. These are statements in your JavaScript script that are appropriately attached to those events.

How does JavaScript handle events?

In this tutorial you’ve already hooked an event handler to an event. More precisely, you attached thealert() command to the onLoad event.
The alert() command is a command which is part of the JavaScript language. The JavaScript interpreter in the browser translates it along these lines:
“Hey, browser, display an alert box that contains the message typed within the () enclosing brackets”
(Notice: JavaScript is case sensitive. If you write Alert instead of alert, your script won’t work!).
As you saw in the previous lesson, simply by writing a JavaScript statement between <script> … </script> tags achieves the execution of that statement as the onLoad event fires up.
However, your JavaScript scripts are capable of doing more interesting stuff when they handle events in response to user actions, for example an onClick event. How do we do that?

Try out: handle an onClick event with JavaScript

The browser already has its own ways of handling events. For instance, when a page has loaded, the browser fires the onLoad event and displays the page contents; when a user clicks a link, the browser communicates to the server to access the requested page, etc. These are called default actions.
The fun of being in charge, though, is not to let the browser do what it likes, but of letting JavaScript do its job and decide what’s to be done.
The simplest way to attach an event handler to an event is to insert the required JavaScript code within the HTML element that produces the event. Let’s have a go by simply preventing the browser default action as the user clicks a link on the page. Fire off your text editor and let’s get coding!
Prepare a new basic HTML document displaying a simple link like the one shown below:
   
   <!DOCTYPE html>
   <html>
   <head>
   <title>Lesson 3: Events and Event Handlers</title>
   </head>
   <body>
   <h1>Lesson 3: Events and Event Handlers</h1>
  
   <a href="http://html.net">Click Me!</a>
  
   </body>
   </html>
   
Run the page in the browser. If you click on the link now, you’ll be landing straight to the HTML.net website. This is the browser default action, as explained above.
Now go back to your HTML document and type the following JavaScript command within the <a> tag, as follows:
   
   <!DOCTYPE html>
   <html>
   <head>
   <title>Lesson 3: Events and Event Handlers</title>
   </head>
   <body>
   <h1>Lesson 3: Events and Event Handlers</h1>
  
   <a href="http://html.net" onclick="alert('Going anywhere? Not so fast!'); return false;">Click Me!</a>
  
   </body>
   </html>
   
Go ahead, run the page in the browser, and … you’re stuck! JavaScript is in control!

What’s just happened there?

That’s how easy it was to take control of a link with JavaScript! All you did was to insert a couple of JavaScript statements to the onclick attribute of the HTML <a> tag.
You already know about the good old alert() command, so I’ll skip over it. The return false; command tells the JavaScript interpreter to return a value, in this case the value equals false, which prevents the browser from performing its default action. You’ll be using this little command quite often in your JavaScript programming life.
You handle the other events listed above in the same way: just insert the JavaScript command as the value of the onfocus, onblur, onmouseover, onmouseout and onsubmit attributes of an HTML element.

Summary

That’ll be all for this lesson. You learned what events are, why events are important in JavaScript programming, and how to use event handlers to let JavaScript be in control of your web page behavior.
But this is just a tiny taste of what JavaScript can do once it’s in charge. Follow on to find out.

Article Source:http://www.techstarcle.com

Read More...

JavaScript Tutorials Your First JavaScript

Now that you know what JavaScript is and what you can do with it, it’s time to get to the practical stuff.
In this lesson you are going to learn:
  • how to embed your JavaScript in the HTML page;
  • how to reference your JavaScript from a separate file;
  • how to comment your JavaScript code and why it is recommended;
  • how to create your first JavaScript-powered web page.
    JavaScript Tutorials Your First JavaScript

The HTML

To insert a JavaScript script in an HTML page, you use the <script> … </script> tag. Don’t forget the closing </script> tag! Now get ready to fire off your text editor of choice and let’s get coding!
Let’s start with a basic HTML page, like this one:
   
   <!DOCTYPE html>
   <html>
   <head>
   <title>My first JavaScript page</title>

   </head>
   <body>

   </body>
   </html>
   
The JavaScript script is inserted either in the HTML page itself or in a separate file.

Embed JavaScript in the HTML page

The <script> tag and its type attribute tell the browser: “Hey, browser! There’s a script coming up, and it’s a JavaScript script.”
You can do this either in the <head> section, as follows:
   
   <!DOCTYPE html>
   <html>
   <head>
   <title>My first JavaScript page</title>
  
      <script type="text/javascript">
   //JavaScript code goes here
      </script>
  
   </head>
   <body>

   </body>
   </html>
   
Or or at the very bottom of the document just before the closing </body> tag, like so:
 
   <!DOCTYPE html>
   <html>
   <head>
   <title>My first JavaScript page</title>
   </head>
   <body>
        
      <script type="text/javascript">
      //JavaScript code goes here
      </script>
  
   </body>
   </html>
   
If you’re wondering whether it’s best to place your <script> tag in the <head> or the <body> tag, then you’re not alone.
It mostly comes down to personal preference. However, because most of the times you’ll want your JavaScript code to run after the web page and all its resources, e.g., stylesheets, graphics, videos, etc., have finished loading in the browser, I suggest you dump your JavaScript <script> tag at the bottom of your page.

Comments, comments, comments

One final thing to note about both code snippets above is the two forward slashes // before the text “JavaScript code goes here”. This is how you comment a one-line JavaScript code.
When a comment spans over more than one line, you use /* Comment goes here */ to delimit a comment, just like you do in a stylesheet. Here’s how it’s done:
 
   <!DOCTYPE html>
   <html>
   <head>
   <title>My first JavaScript page</title>
   </head>
   <body>
        
      <script type="text/javascript">
   /* JavaScript code
   goes here */
      </script>
  
   </body>
   </html>
   
When the JavaScript interpreter in your browser comes across either ‘//’ or ‘/* */’, it just ignores whatever text is placed in between. Use comments in your code to remind your future self of what your code is designed to do. One day you’ll be happy to have done so, just take my word for it!

Insert JavaScript in a separate file

If your script is longer than a few lines, or you need to apply the same code to several pages in your website, then packaging your JavaScript code into a separate file is your best bet.
In fact, just like having your CSS all in one place, well away from HTML code, having your JavaScript in its own file will give you the advantage of easily maintaining and reusing your scripts.
Here’s how it’s done:
 
   <!DOCTYPE html>
   <html>
   <head>
   <title>My first JavaScript page</title>
      <script type="text/javascript" src="yourjavascript.js"></script>
   </head>
   <body>
        
   </body>
   </html>
 
As you can see, the <script> tag references an external file, “yourjavascript.js” that has the .js extension and contains the script that puts the magic into your web page.

Your first JavaScript-powered page: Hello World

Without further ado, let’s see if JavaScript works in your browser.

Try out: embedded JavaScript in an HTML page

Between the <script> and </script> tags either in the <head> or the <body> of your HTML document, add the following line of code, just after the comment:
 
   <!DOCTYPE html>
   <html>
   <head>
   <title>My first JavaScript page</title>
   </head>
   <body>
        
   <script type="text/javascript">
   //JavaScript code goes here
   alert('Hello World!');
      </script>
  
   </body>
   </html>
 
This is your first JavaScript statement, that is, you’ve just instructed your web page to do something. Don’t worry about the code just yet, we’ll be coming back to the alert() command again and again in the following lessons.
Just notice the semicolon ( ; ) at the end of the statement. This is important: it tells the JavaScript interpreter that the statement is finished and whatever comes next is a different statement.
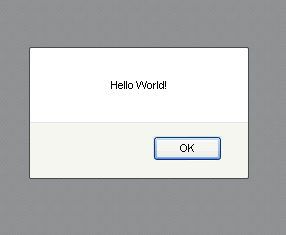
Now save your work and run the page in your favorite browser. You’ll see an alert box popping up on page load. This is how the page looks in Firefox:
JavaScript Tutorials Your First JavaScript
If your alert box is not popping up, then check that you’ve typed the JavaScript command exactly as it is in the sample code.
Make sure your <script>…</script> tags are there, that the text between the brackets is surrounded by quotes (‘ ‘), and that there is a semicolon ( ; ) at the end of the statement. Then try again.

Try out: JavaScript in a separate file

Create a new document in your text editor and save it as “helloworld.js”. Important: the file extension has to be .js (this is the appropriate JavaScript file extension).
In the new document, paste in the JavaScript command from the previous example (no need to type the <script> … </script> tags here):
 
   alert('Hello World!');
 
Now, go back to the HTML page, delete the previous JavaScript code, and add the <script> … </script> tags in the <head> section of the page with a reference to the helloworld.js JavaScript file, like so:
   <!DOCTYPE html>
   <html>
   <head>
   <title>My first JavaScript page</title>
   <script type="text/javascript" src="helloworld.js"></script>
   </head>
   <body>
        
   </body>
   </html>
 
Save all your documents and run the HTML page in the browser. You should view the same alert box popping up as in the previous example.
If the code doesn’t work, in your HTML document check that the filepath to the JavaScript file is correct, the filename spelling is accurate, and double-check that you’ve added a closing </script> tag. In helloworld.js make sure your JavaScript command is typed exactly the same as in the sample code above, then try again.

Summary

You’ve actually learned a lot in this lesson. You know how and where to include JavaScript in your web page, how to comment your JavaScript code and why this is a good idea, and finally you’ve just seen your web page come alive with your first JavaScript script.
Admittedly, an alert box saying “Hello World!” looks a bit dumb, but even alerts can be useful to quickly and easily test that JavaScript is enabled in your browser and your code is working.
It’s time for a well deserved break. In lesson 3 you’ll be tackling another core topic in your JavaScript journey: events. Get ready!
Read More...
 
Copyright (c) 2016 programmertrends